Pro Tips & Commands for Essential Software & Tools
1. Introduction of This Document
This document is used to record my personal habits of work and study. Many tools and tricks will be used to improve the efficiency.
2. Essential Software
2.1 Everything
2.1.1 Download
Everything is a software which is used to search your file quickly.
2.1.2 Tricks
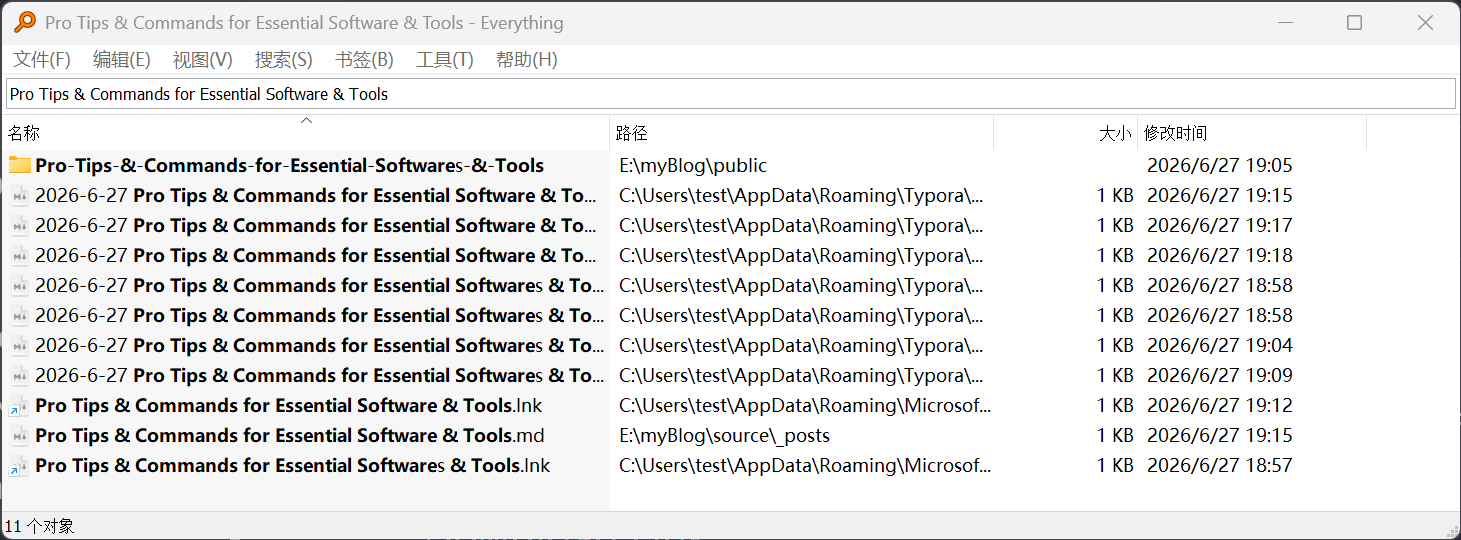
2.1.2.1 Precise Research.
For example, search for “Pro Tips & Commands for Essential Software & Tools”.
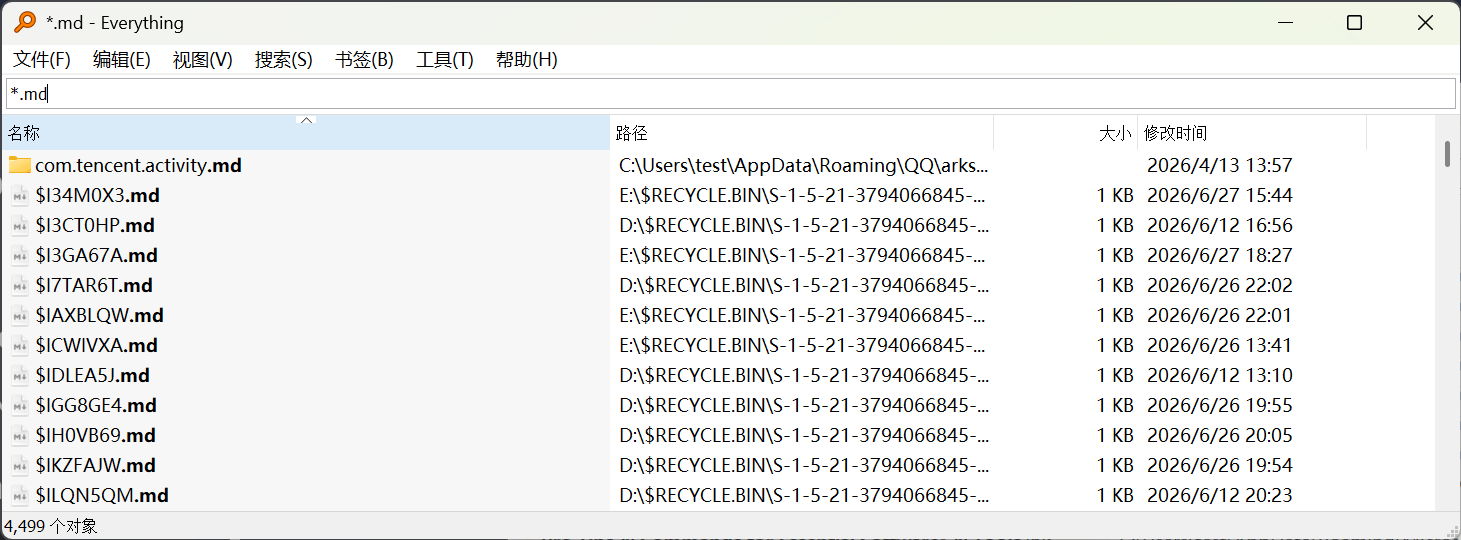
2.1.2.2 Wildcard Research
For example, search for markdown file.
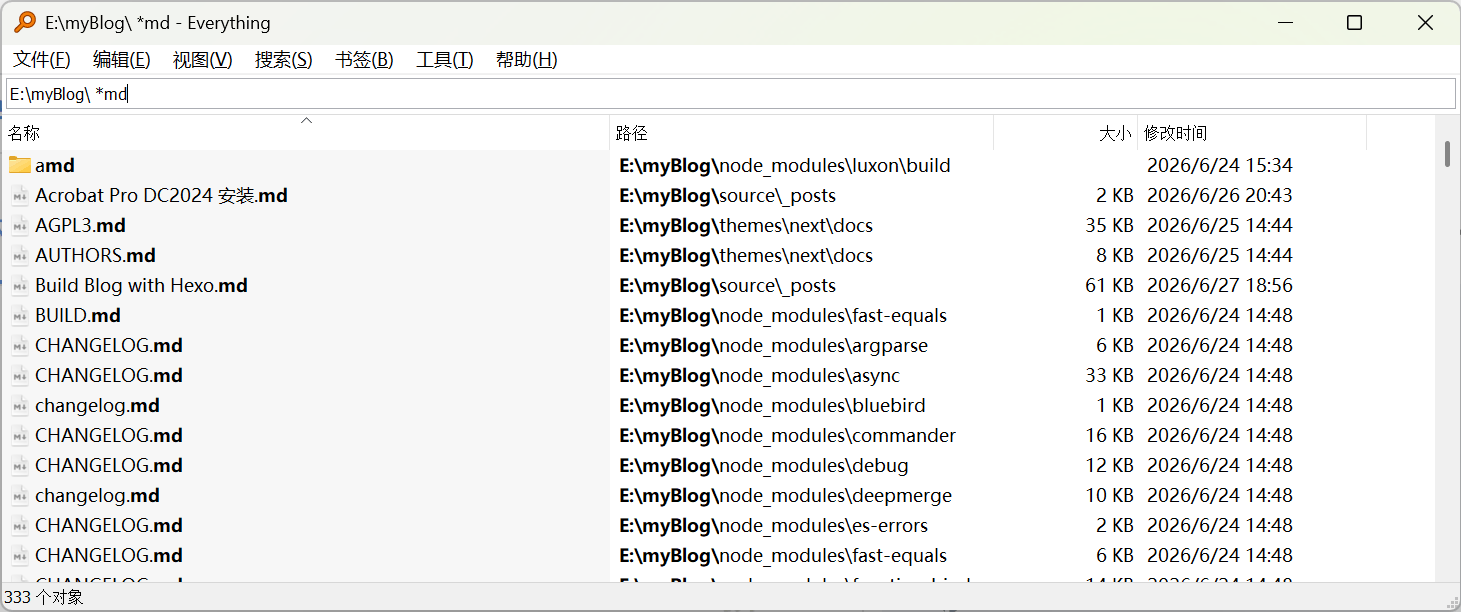
2.1.2.3 Search in specified directory
Add a path in front of the search content:
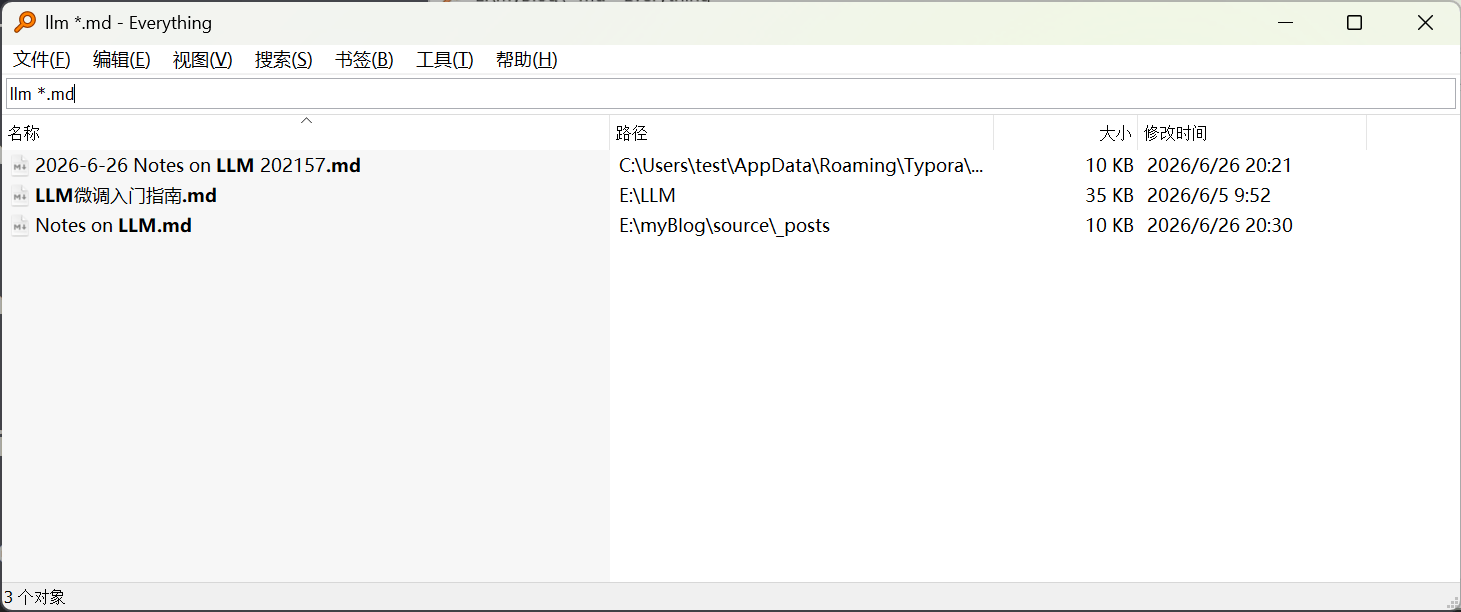
2.1.2.4 Combination Research
Use different keywords to research:
2.2 Drawio
drawio-desktop is a diagramming desktop app based on Electron that wraps the core draw.io editor.
Download built binaries from the releases section. Download the windows-installer.exe
Double-click to start the install app.
2.3 PixPin
PixPin is a free(for most functions) software for screenshot and paste.
2.3.1 Configure the Hot Keys
Some original hot keys comflict with the Editor like Typora and some functions are useless for me. So go to the settings and clear all the hot keys first, then configure the following hotkeys:
Screenshot Function:
CTRl + ALT + APaste Function
CTRL + ALT + SQuick Restore the Paste
CTRL + ALT + R
2.3.2 Screenshot Function
CTRL + ALT + A: start the screenshot function, and
select the area you wanna screen shot.
2.3.2.1 Long Screenshot Function
After starting the screenshot function, press L or click
the Long Screenshot button to startup the function:

The demonstration effect is as follows:
2.3.2.1 Screen Record Function
After starting the screenshot function and selecting the area, press
G or click the Screen Record button to startup the
function, you can configure the countdown, volume and other selective
configuration… Test , this is how it works. And you can choose the
output format like gif or mp4:

2.3.3 Paste Function
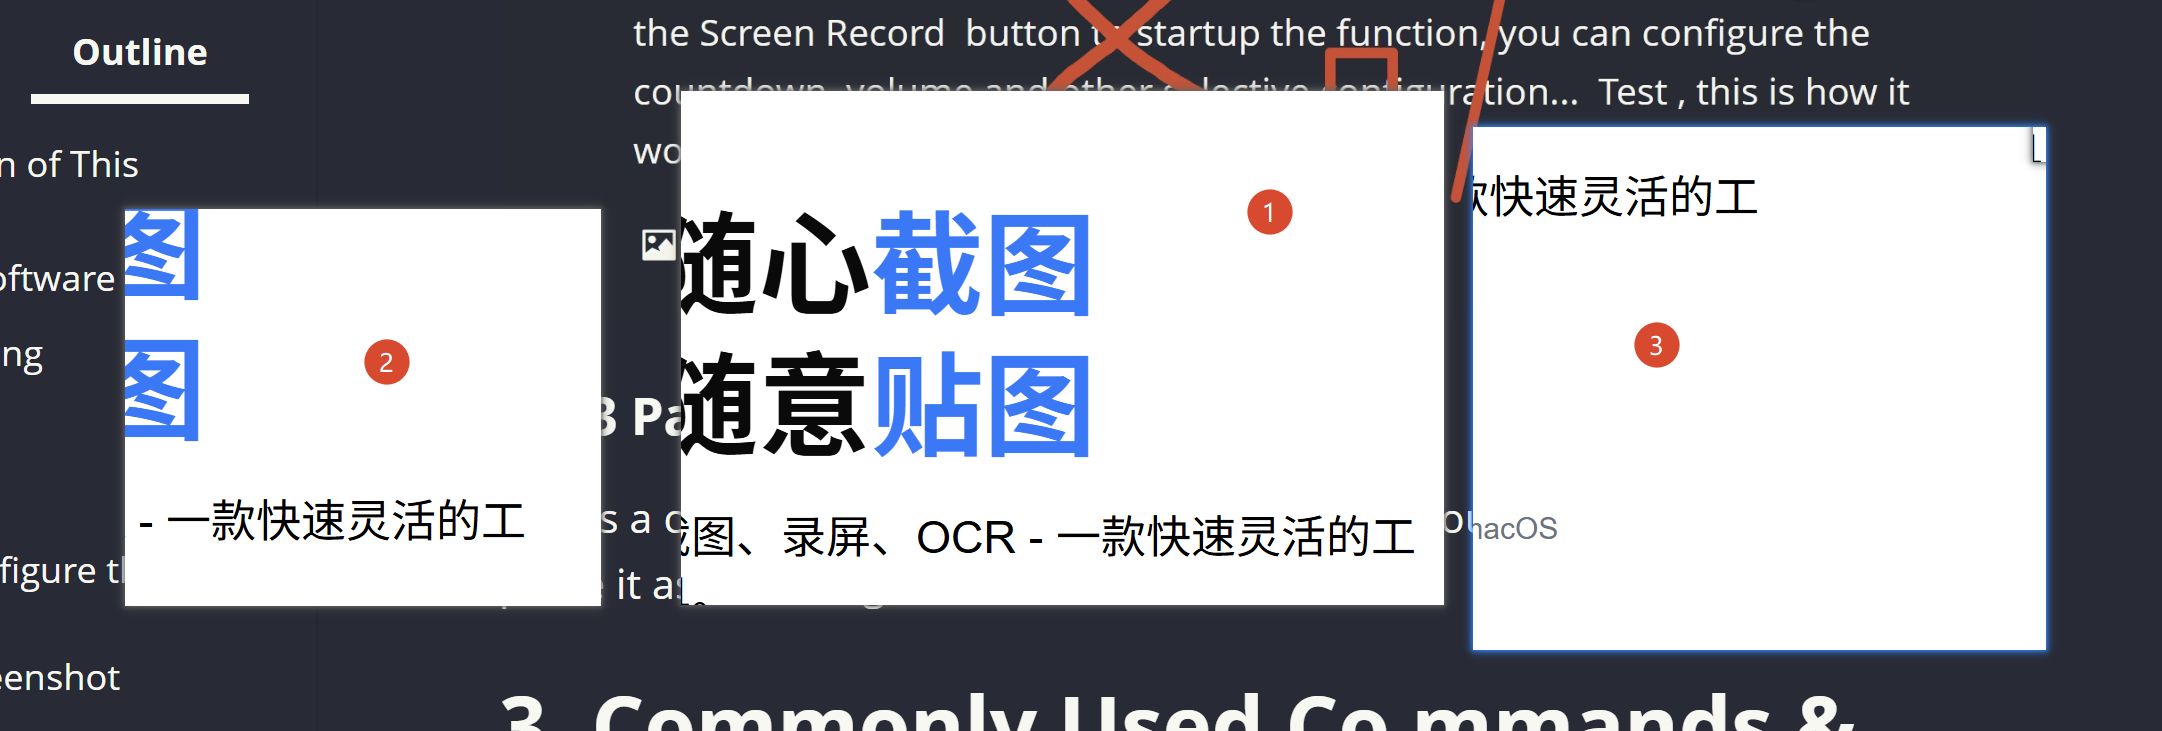
This is a core function of this tool. Which allows you to screenshot a picture and paste it as a floating window. I paste three screenshots from webpage, so I can check them when I write the article.
2.3.3.1 Paste when Screenshot
When screenshot a picture, you can choose save and close
or paste.
If you click paste directly, you can get this :
2.3.3.2 Paste What You Copied
If you take a screenshot and choose save and close , or
you just copied some texts. You can use CTRL + ALT + S
function to paste it.
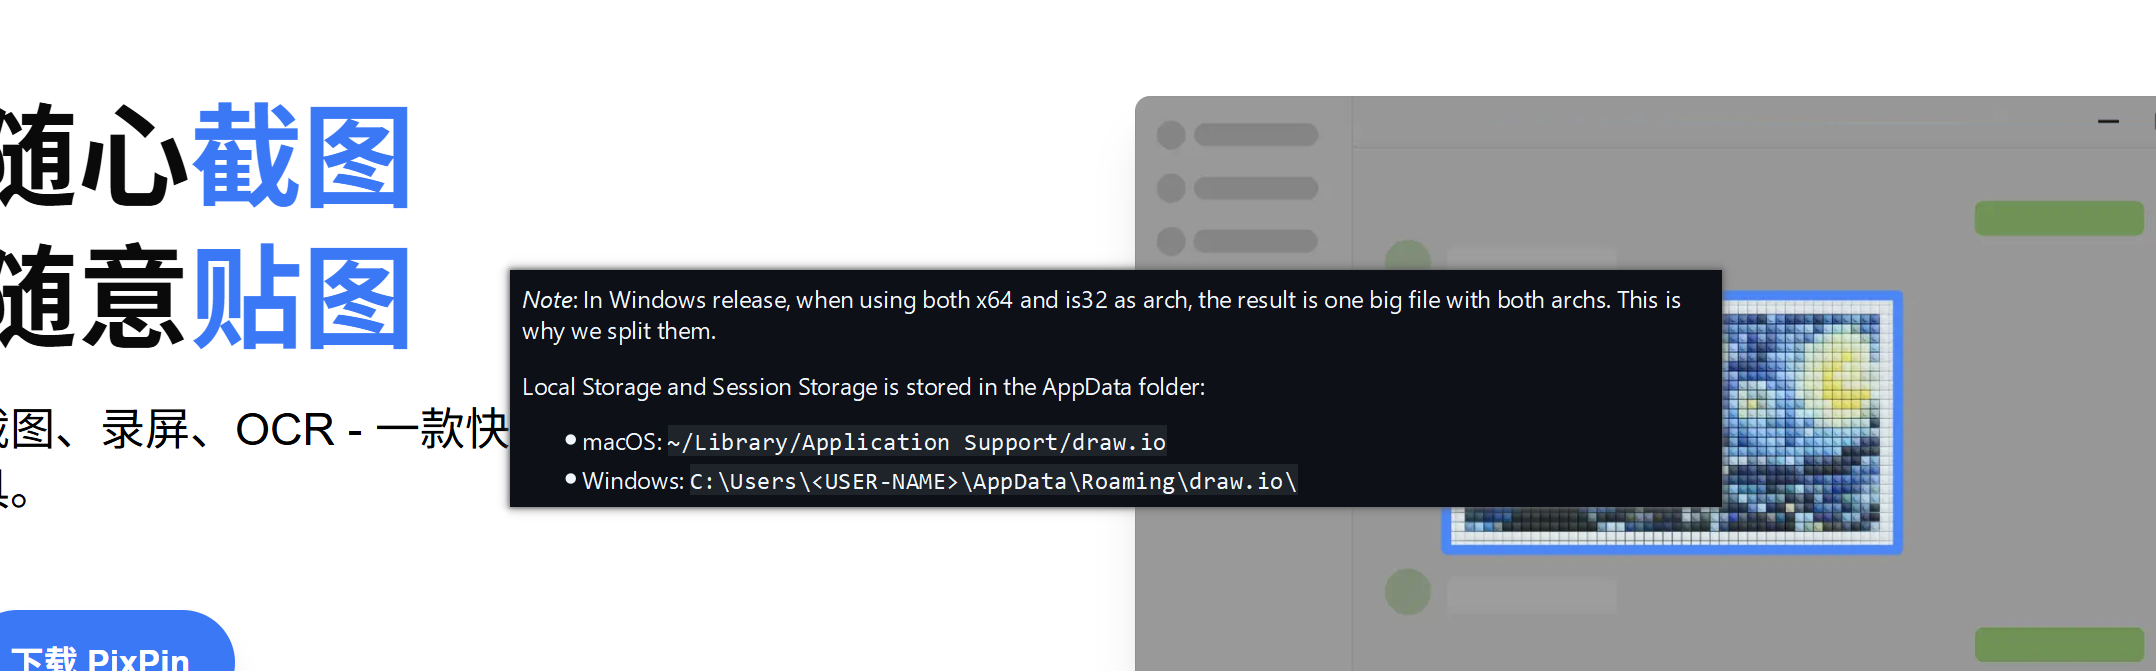
The balck window in the below picture is what I copied and use
CTRL + ALT + S to paste it
2.3.3.3 Lock what You pasted
Click L to fix the paste’s position. And press again to
unlock it.
2.3.3.4 Quick Close and Restore the Paste
Double-click the paste to close the paste quickly.
CTRL + ALT + R to restore what you just closed.
2.4 Ditto
Ditto is an extension to the standard windows clipboard. It saves each item placed on the clipboard allowing you access to any of those items at a later time. Ditto allows you to save any type of information that can be put on the clipboard, text, images, html, custom formats.
Make a new cache file :
D:\softwares\Ditto\ditto_cache\Ditto.db
[!WARNING]
Set the default hotkey of activating Ditto as CTRL + SHIFT + `
2.5 Hallelujah IME (Aborted)
Hallelujah is an English IME.
The Microsoft’s original English IME is too worse. So I decide to replace it with Hallelujah.
Install:
Releases · dongyuwei/Hallelujah-Windows
Notice:
Add it in the keyboard setting of Microsoft.
- 具备 Text-Expander 功能(可在偏好设置Web页面 http://localhost:62718 中添加/删除)。
用户可以定义自己常用的词组,比如
{"yem":"you expand me"},那么当输入yem时会显示you expand me。 - 支持按拼音来输出对应英文。如输入
suanfa,输入法会候选词中会显示algorithm。 - 按键盘右侧
shift键可以在智能英语输入模式与传统英语输入模式间切换。 - 拼音输入中文(Pinyin to
Chinese):按
右Command键切换到拼音输入模式,输入拼音(或首字母缩写)即可打出中文汉字。例如输入niha或首字母nh,候选词会显示”你好”、“你还”等。再次按右Command切回智能英语输入模式。
2.6 Zotero
Zotero is a free, easy-to-use tool to help you collect, organize, annotate, cite, and share research.
Zotero | Your personal research assistant
2.6.1 Install & Registration
Install Zotero
Download and install.
The Zotero is bound to the browser of your pc.
Install Zotero Connector, a extension for scraping data on your browser.
Register a new account on official website
Register an account: Register
Log in your account on pc
Open Zotero and click : ‘Edit’ ➡ ‘Setting’ ➡ ‘Sync’ and Log in.
2.6.2 Chinese Language Paper Plugin (Not Necessary)
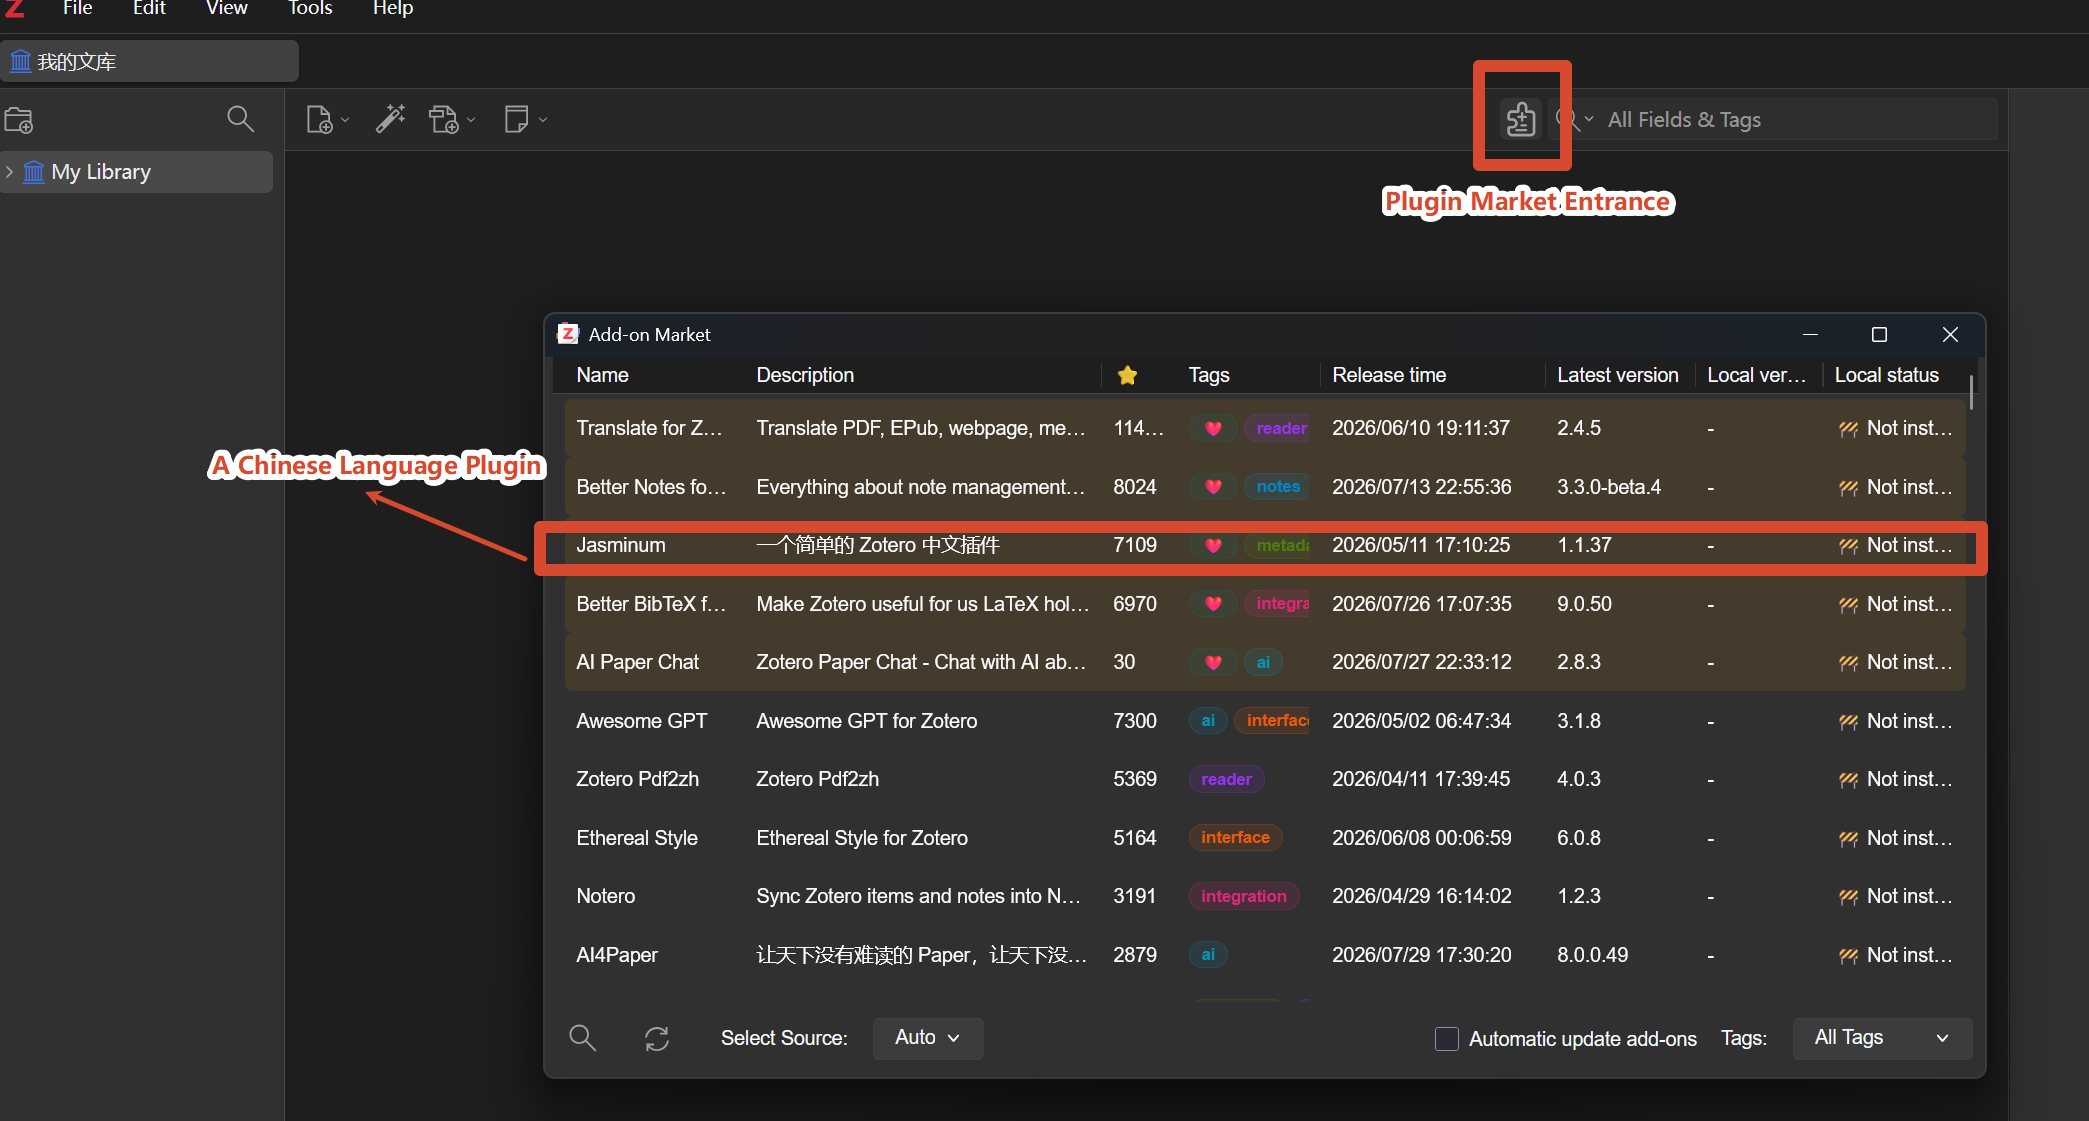
Download the plugin market so that we can download other plugins within Zotero.
You will download a
zotero-addons.xpifile.Install plugin market
Zotero ➡ Tools ➡ Plugins ➡ Setting Gear ➡ Install Plugin from File
Install the Jasminum plugin.
The Jasminum plugin is to support Chinese Language Papers which I will barely use…
![]()
2.6.3 Configure Storage Settings
自定义 Zotero 数据存储位置 | Zotero 中文社区
Edit ➡ Settings ➡ Advanced ➡
Data Directory Zotero
The default directory is : C:\Users\test\Zotero
- Choose another directory manually as new Data Directory of Zotero.
- Confirm and close Zotero
- Copy all files of default directory to new one.
- Open the Zotero
2.6.4 Quick Guide
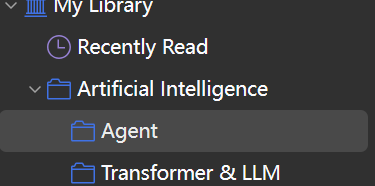
Create a new collection for same classification papers. And you can create subcollections:
![]()
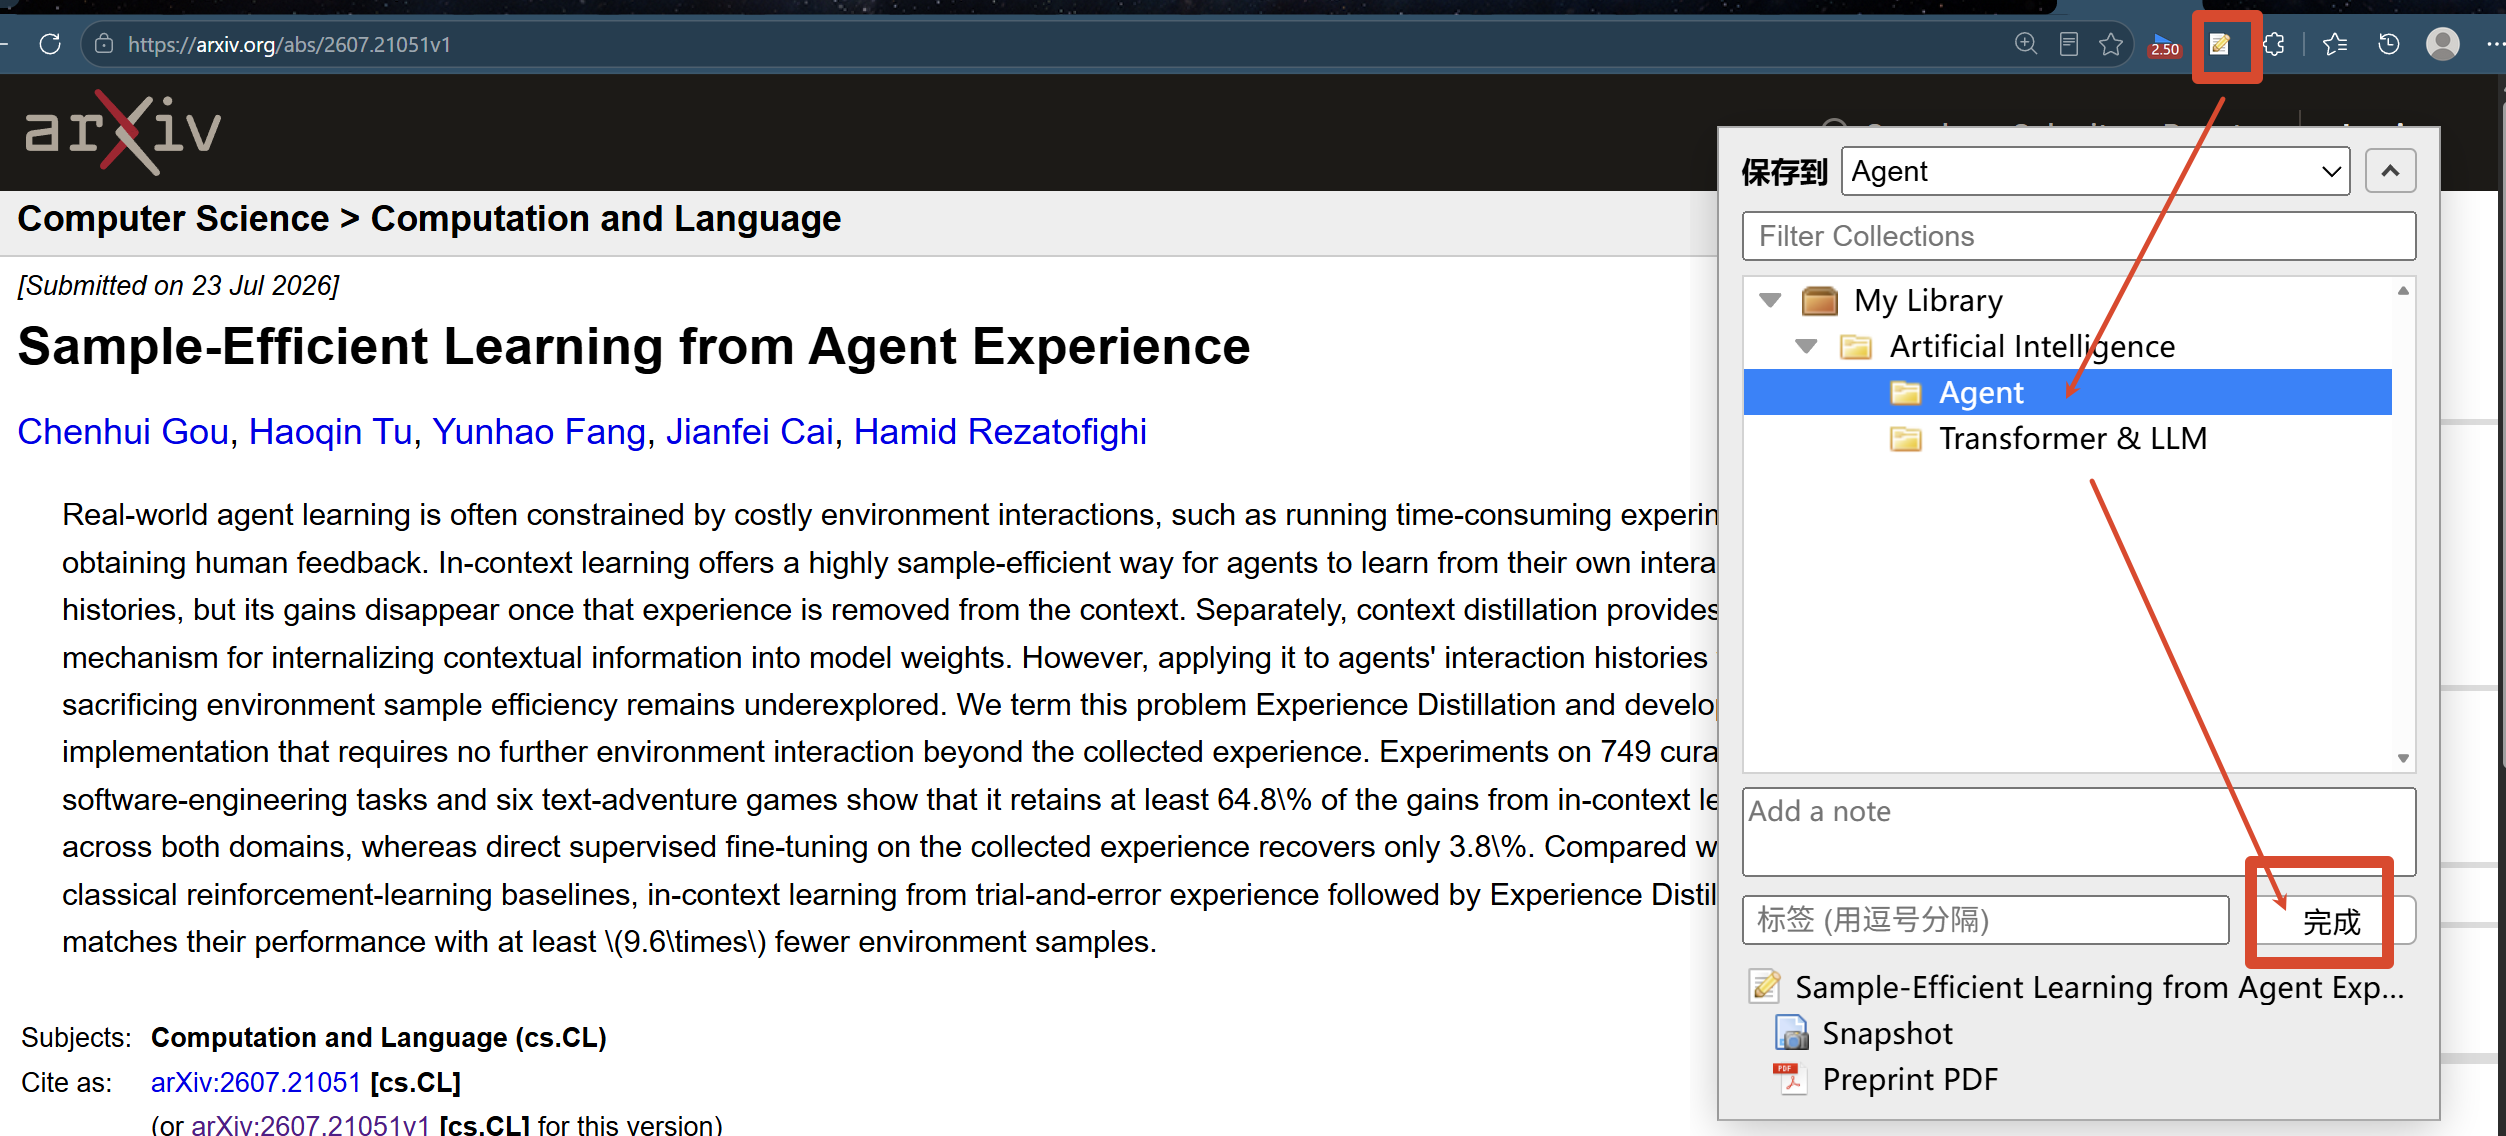
Add Literatures on Web Site
e.g.
![]()
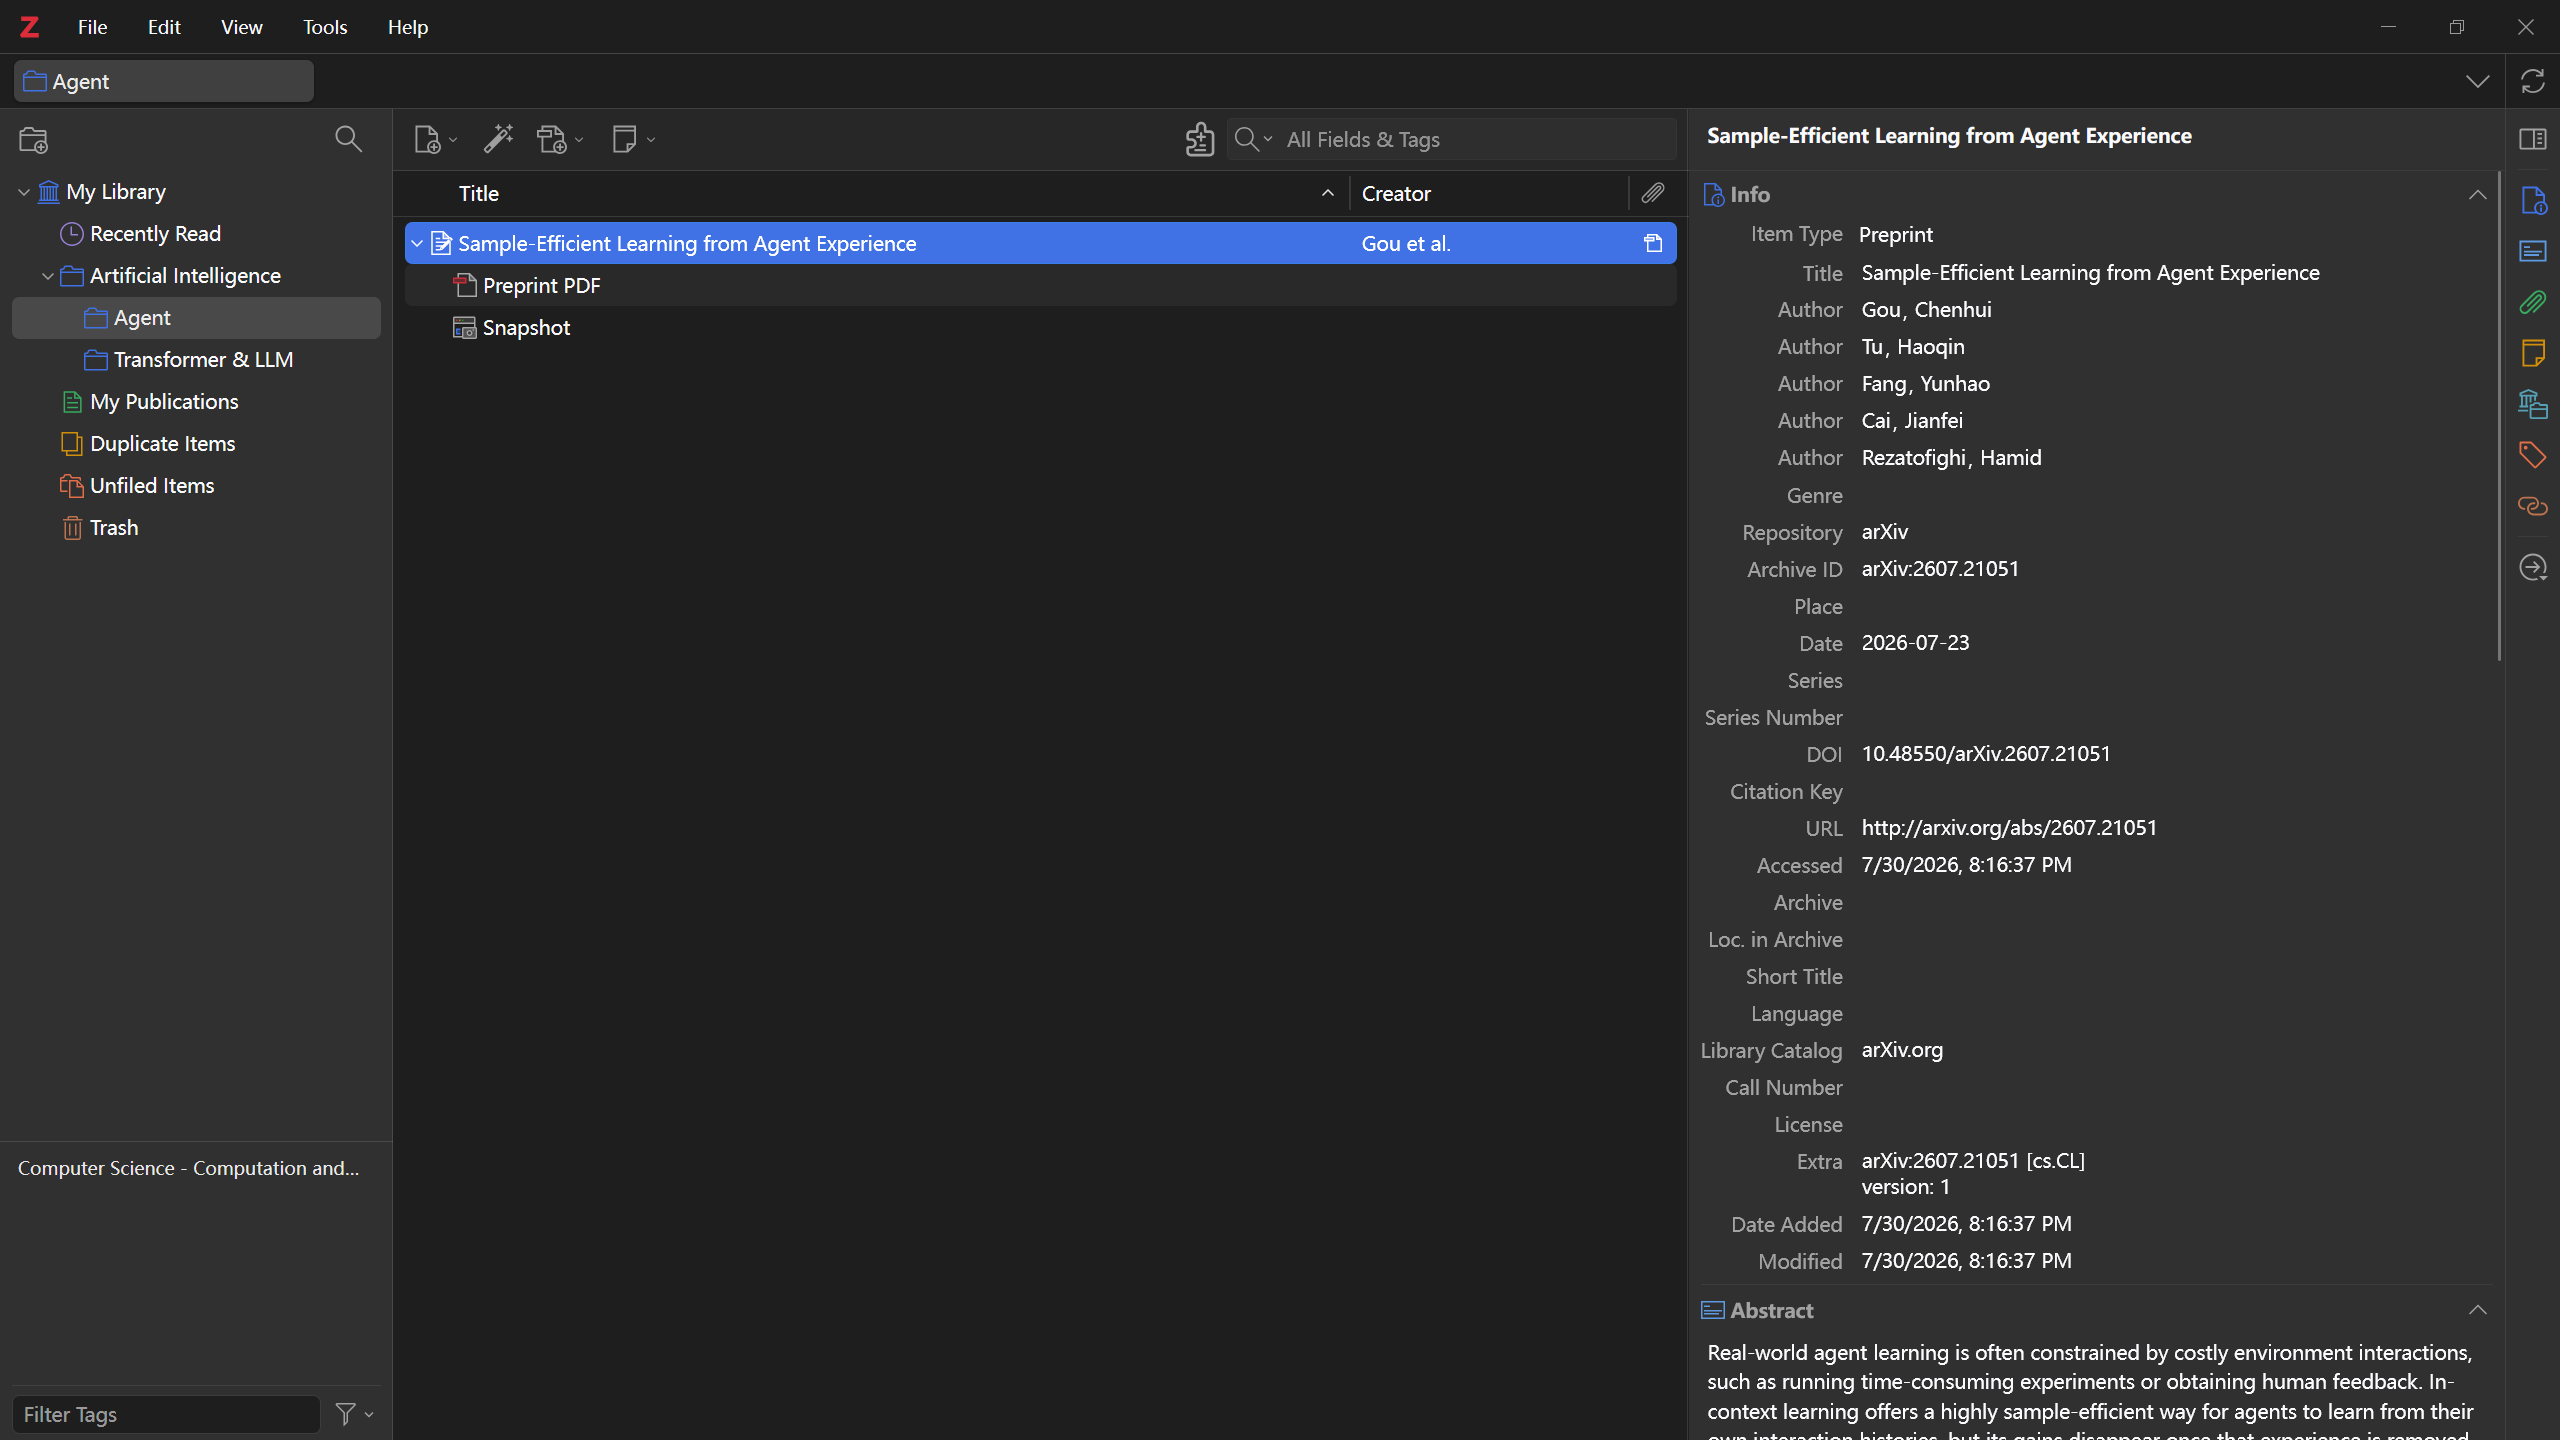
Check on Local Zotero
![]()
2.6.5 Popular Plugins
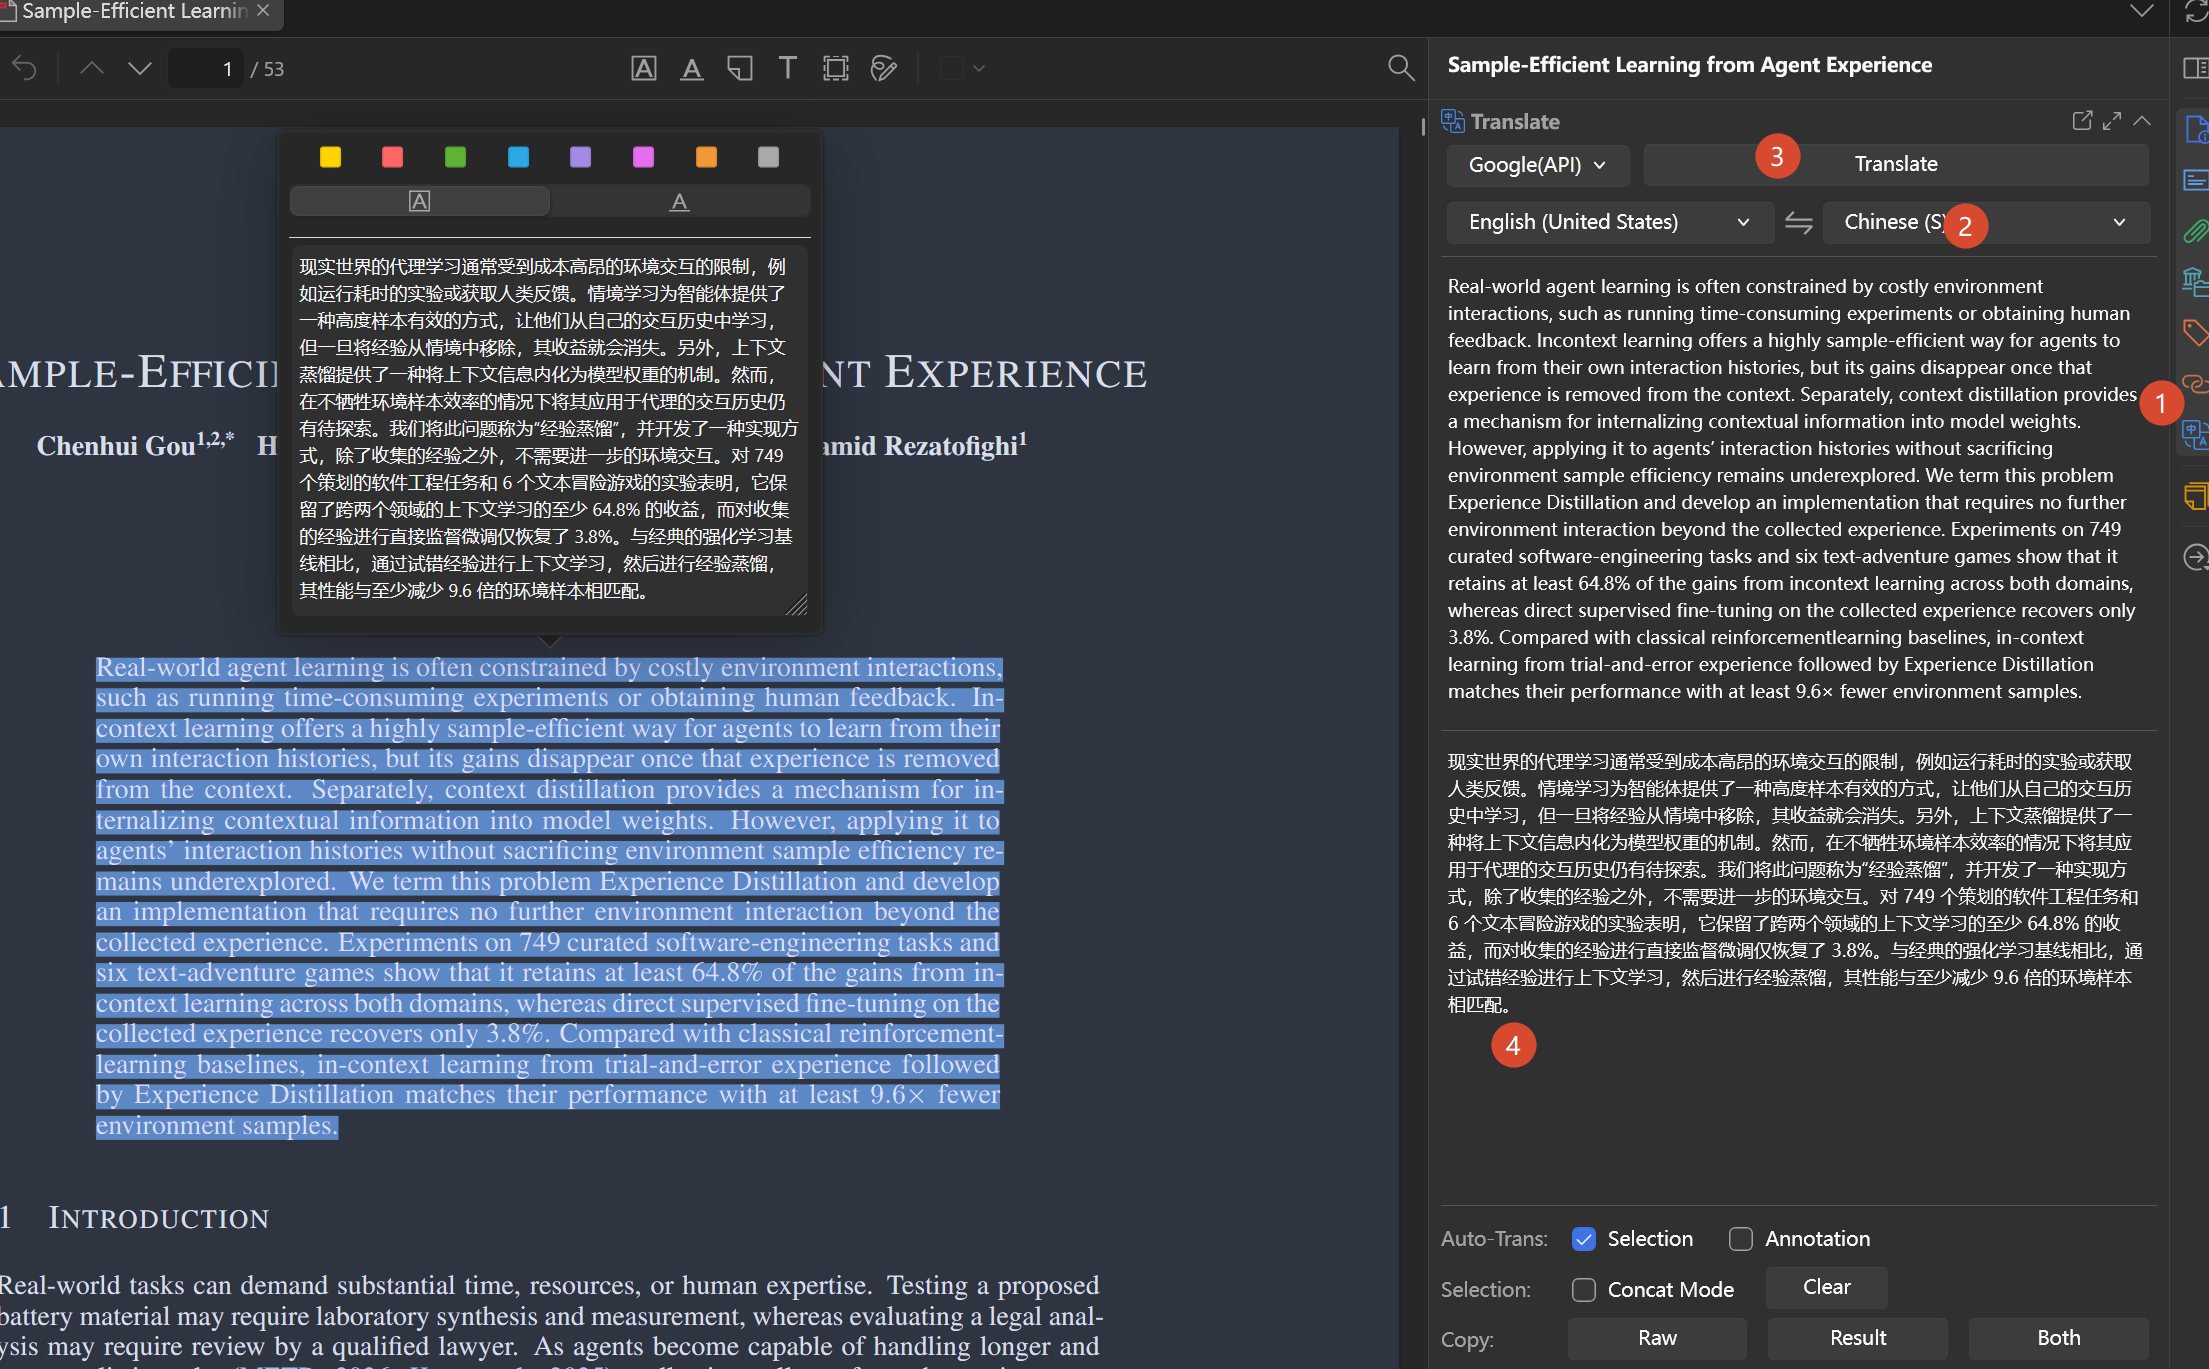
Translate for Zotero
![]()
3. Configurations & Tricks
3.1 Cursor / Keywords
The tricks are not always work for different editors.
3.1.1 Basic Cursor Movement
Ctrl + Left/Right Arrow: Move cursor one word to the
left/right. (works in typora, git bash, vscode, vim)
Ctrl + Up/Down Arrow: Move current line up/down.
Home/End: Move cursor to the beginning/end of the line.
(works in typora, git bash, vscode, vim)
3.1.2 Quick Text Selection
Ctrl + D: Select current word. (works in typora,
vscode)
Ctrl + Backspace: Delete the word. (works in typora,
vscode)
Ctrl + Shift + Left/Right Arrow: Select text one word to
the left/right. (works in typora)
Shift + Left/Right Arrow: Select text one char to the of
the line. (works in typora)
Shift + Home/End: Select text to the beginning/end of
the line. (works in typora)
Ctrl + A: Select all text in the document. (works in
typora)
3.1.3 Line Operations
Alt + Up/Down Arrow: Move current line up/down. (works
in typora)
Shift + Alt + Up/Down Arrow: Duplicate current line
up/down.
Ctrl + X (with no selection): Cut or delete the entire
current line.
Ctrl + C (with no selection): Copy the entire current
line.
Ctrl + Enter: Insert a new line below the current
line.
Ctrl + Shift + Enter: Insert a new line above the
current line.
3.1.4 Hot Keys
Ctrl + F: Open the Find search box. (works in
typora)
Ctrl + H: Open the Find and Replace box. (works in
typora)
Ctrl + G: Go to a specific line number.
Ctrl + P: Quick open a file by name. (works in
typora)
Ctrl + Tab: Switch between recently opened tabs.
3.2 Hexo
3.2.1 Quick Update
Quick deploy:
1 | cd /e/myBlog && python compress_images.py && python path_convert.py online && git add . && git commit -m "update" && git push && hexo clean && hexo g -d |
Re-deploy when network has problems:
1 | git push && hexo clean && hexo g -d |
3.3 Git
3.3.1 Git Tags
Sometimes, when the repository is stable already, we want a method to
remember this state of repository, we can use the command:
git tag.
This command is used to mark the latest commit with some info, for example:
1 | # give the latest commit a tag named "v1.0.0" |
When your repo is chaotic, you can go back to the tag:
1 | # show all the tags |
Note: Don’t use git push directly, the
git push command won’t push the tag by default.
Use git push to push codes:
1 | git push |
Use git push origin 'tag name' to push tag:
1 | git push origin 'tag name' |
Use git push origin --tags to push all the tags:
1 | git push origin --tags |
3.4 VS Code
3.4.1 Recognize
.traj files as .json permanently
.traj file is in fact a .json file. So we
want to make VS Code recognize it as .json.
Press Ctrl + Shift + P,
inputPreferences: Open User Settings (JSON)
Add an extra item in the curly braces(Note, you should add a comma in the end of previous item):
1 | "files.associations": { |
3.4.1 Extension: Markdown Preview Enhanced
To view markdown file, just download this extension.
Press: ctrl + shift + v to view.
3.5.2 Jump by Row Number
Press CTRL + G
3.5 Xshell
3.5.1 Prevent Disconnection
When you run a long-time-cost job, it is common that you won’t press any key in several hours. To prevent the auto-disconnect, we need to configure some settings.
File->Default Session Properties->Connection->Keep Alive
Check the box:
Send keep alive messages while this session is connected,
set the internal as 60 sec.
3.5.2 Log Settings
Change Default Log Path:
Tools->Options->Log->Session Log->Log Folder:change it into:
D:\xshell_logChange Default Session Log Config:
File->Default Session Properties->Advanced->Logging->Log File->File Path:This blank is to set the format of your log file:
%n_%Y-%m-%d.logis recommended. This format will generate one log file per day per session.Uncheck
Overwrite if the file existsCheck
Start logging upon_connectionUncheck
Prompt me to choose a file path when logging startsEncoding: choose optionUnicode (UTF-8)
File->Default Session Properties->Advanced->Logging->Timestamp:- Check
Write in Log File - Format:
[%Y-%m-%d %h:%m:%s](Note, it is recommended to add an extra whitespace after the time).
3.5.2 Terminal Scroll Buffer Setting
File->Default Session Properties->Terminal->
Scroll Buffer:
- Set
Buffer Sizeas20000. - Check
Push erased screen into Scroll Buffer
3.5.3 Outlook Settings
Create a new xcs file named SolarizedDarkModify:
1 | [SolarizedDarkModify] |
Click: Tools->Color Themes
->Import, choose the
SolarizedDarkModify.xcs. And switch to this theme.
Then, File->Default Session Properties
-> Appearance:
Select the color theme: SolarizedDarkModify
Amend font size: 14
Cursor Color: choose pink oneRGB: 255, 121, 198
Check: Use blinking cursor
millisec: 500
Text Color: White
Appearance: Vertical Line
3.5.4 Quick Command
Check: View -> Quick Command ->
Quick Command Bar
Click: Quick Command Bar ->
Add a Button, add a new quick command.
For example:
1 | Name: nvidia smi |
3.5.5 Mouse Operation Setting
Tools -> Option ->
Terminal -> Mouse :
Choose the option of Right button:
Paste the clipboard contents
Tools -> Option ->
Terminal -> Selection :
Check:
Copy selected texts to the clipboard automatically
Uncheck:
Include the last new line character when copying the selected texts
3.5.6 Hightlight Sets
Tools -> Highlight Sets
Create a new sets.
3.6 Typora
3.6.1 Insert a Catalog
Click Paragraph -> Table of Contens will
generate a catalog which is appropriate to put at the begging of the
article.
3.6.2 Insert Alert Table
Click Paragraph ➡ Alert ➡ ...
can generate different special blocks. The demos are as follows:
[!NOTE]
[!TIP]
[!WARNING]
[!CAUTION]
[!IMPORTANT]
3.6.3 Collapsible Block
We can use the tag details of html5 to
create a collapsible block.
You can simply use <details> to create a
collapsible block. And use a tag <summary> to add a
name of the block.
Grammar:
Normal Text
1
2
3
4<details>
<summary>Normal Text</summary>
text
</details>Effect:
Normal Text
test
Code
1
2
3
4
5
6<details>
<summary>Block_Name</summary>
<pre><code>
printf("Hello World!");
</code></pre>
</details>effect:
Block_Name
     printf("Hello World!");
     System.out.println("However, the code can't be highlighted ");
Code Block
Block_Name
<pre><blockcode>printf(“Hello World!”); System.out.println(“However, the code can’t be highlighted”);
3.6.4 Preferences
3.6.4.1 Files
File ➡ Preferences ➡ Files:
- On Lunch:
Restore last closed files and folders
3.6.4.2 Editor
File ➡ Preferences ➡ Editor:
- Indent Size on Save:
2 - ❌Petty Indentation
- ❌Auto pair common Markdown syntax
- ❌Display source for simple blocks on focus
3.6.4.3 Markdown
File ➡ Preferences ➡ Markdown:
- Heading Style:
atx (#) - Unordered List:
- - Ordered List:
1.2.3. - ❌Subscript
- ❌Superscript
- ❌Smart Quotes
- ❌Smart Dashes
- ❌Remap Unicode Punctuation on Parse
- ❌Auto wrap long lines
- Use Shift+Tab to auto indent selected code
- Default Code Language:
python - Math Related Items:
- Check all items but
Enable physics package
- Check all items but
- Auto Numbering Math Equations:
No Auto Numbering Math Equations - Copy/export HTML (without style):
Use Rendered SVG - ❌Indent first line of paragraphs
- When Writing:
Preserve sequential whitespace and single line break - Export / Print:
Preserve sequential whitespace and single line break
3.6.4 Modify Hotkey & Shortcut key
3.6.4.1 Introduction
You can use shortcut keys to quickly insert or modify styles or do other operations supported by Typora.
That means you could not add extra function that not originally supported by Typora.
The default Frequently Used Shortcut Keys are as
follows:
3.2.2.1.1 File
| Function | Hotkey (Windows/Linux) | Hotkey (macOS) |
|---|---|---|
| New | Ctrl + N | Command + N |
| New Window | Ctrl + Shift + N | Command +Shift + N |
| New Tab | (Not Supported) | Command + T |
| Open | Ctrl + O | Command + O |
| Open Quickly | Ctrl + P | Command + Shift + O |
| Reopen Closed File | Ctrl + Shift + T | Command + Shift + T |
| Save | Ctrl + S | Command + S |
| Save As / Duplicate | Ctrl + Shift + S | Command + Shift + S |
| Preference | Ctrl + , | Command + , |
| Close | Ctrl + W | Command + W |
3.2.2.1.2 Edit
| Function | Hotkey (Windows/Linux) | Hotkey (macOS) |
|---|---|---|
| New Paragraph | Enter | Enter |
| New Line | Shift + Enter | Shift + Enter |
| Cut | Ctrl + X | Command + X |
| Copy | Ctrl + C | Command + C |
| Paste | Ctrl + V | Command + V |
| Copy As Markdown | Ctrl + Shift + C | Command + Shift + C |
| Paste As Plain Text | Ctrl + Shift + V | Command + Shift + V |
| Select All | Ctrl + A | Command + A |
| Select Line/Sentence Select Row (in table) | Ctrl + L | Command + L |
| Delete Row (in table) | Ctrl + Shift + Backspace | Command + Shift + Backspace |
| Select Style Scope Select Cell (in table) | Ctrl + E | Command + E |
| Select Word | Ctrl + D | Command + D |
| Delete Word | Ctrl + Shift + D | Command + Shift + D |
| Jump to Top | Ctrl + Home | Command + ↑ |
| Jump to Selection | Ctrl + J | Command + J |
| Jump to Bottom | Ctrl + End | Command + ↓ |
| Find | Ctrl + F | Command + F |
| Find Next | F3 / Enter | Command + G / Enter |
| Find Previous | Shift + F3 / Shift + Enter | Command + Shift + G / Shift + Enter |
| Replace | Ctrl + H | Command + H |
3.2.2.1.3 Paragraph
| Function | Hotkey (Windows/Linux) | Hotkey (macOS) |
|---|---|---|
| Heading 1 to 6 | Ctrl + 1/2/3/4/5/6 | Command + 1/2/3/4/5/6 |
| Paragraph | Ctrl + 0 | Command + 0 |
| Increase Heading Level | Ctrl + = | Command + = |
| Decrease Heading Level | Ctrl + - | Command + - |
| Table | Ctrl + T | Command + Option + T |
| Code Fences | Ctrl + Shift + K | Command + Option + C |
| Math Block | Ctrl + Shift + M | Command + Option + B |
| Quote | Ctrl + Shift + Q | Command + Option + Q |
| Ordered List | Ctrl + Shift + [ | Command + Option + O |
| Unordered List | Ctrl + Shift + ] | Command + Option + U |
| Indent | Ctrl + [ / Tab | Command + [ / Tab |
| Outdent | Ctrl + ] / Shift + Tab | Command + ] / Shift + Tab |
3.2.2.1.4 Format
| Function | Hotkey (Windows/Linux) | Hotkey (macOS) |
|---|---|---|
| Strong | Ctrl + B | Command + B |
| Emphasis | Ctrl + I | Command + I |
| Underline | Ctrl + U | Command + U |
| Code | Ctrl + Shift +
| Command + Shift + |
|
| Strike | Alt + Shift + 5 | Control + Shift + ` |
| Hyperlink | Ctrl + K | Command + K |
| Image | Ctrl + Shift + I | Command + Control + I |
| Clear Format | Ctrl + \ | Command + \ |
3.2.2.1.5 View
| Function | Hotkey (Windows/Linux) | Hotkey (macOS) |
|---|---|---|
| Toggle Sidebar | Ctrl + Shift + L | Command + Shift + L |
| Outline | Ctrl + Shift + 1 | Command + Control + 1 |
| Articles | Ctrl + Shift + 2 | Command + Control + 2 |
| File Tree | Ctrl + Shift + 3 | Command + Control + 3 |
| Source Code Mode | Ctrl + / | Command + / |
| Focus Mode | F8 | F8 |
| Typewriter Mode | F9 | F9 |
| Toggle Fullscreen | F11 | Command + Option + F |
| Actual Size | Ctrl + Shift + 0 | (Not Supported) |
| Zoom In | Ctrl + Shift + = | (Not Supported) |
| Zoom Out | Ctrl + Shift + - | (Not Supported) |
| Switch Between Opened Documents | Ctrl + Tab | Command + ` |
| Toggle DevTools | Shift + F12 | - |
3.6.4.2 Inline Math
This function is not in the table above, but is supported.
Menu Bar:
File ➡ Preferences ➡ General ➡ Advanced Settings ➡ Open Advanced Settings
Modify conf.user.json :
e.g. Add a new shortcut key for inline math:
1 | "keyBinding": { |
Save and restart Typora, and the shortcut key is valid now.
3.6.4.3 Re-bind Replace Hotkey
In the table we can see that the Hotkey of Replace is
CTRL + H
Replace it by CTRL + R :
1 | C:\Users\%USER%\AppData\Roaming\Typora\conf\conf.user.json |
1 | "Replace": "Ctrl+R" |
3.6.4.4 Highlight
Preliminary:
- File ➡ Preference ➡ Markdown ➡ Syntax Support:
- The hotkey
CTRL + His available: In fact the originalCTRL + His the hotkey of Replace. So we should replace it in advance.
1 | C:\Users\%USER%\AppData\Roaming\Typora\conf\conf.user.json |
1 | "Highlight": "Ctrl+H" |
3.6.4.5 Code
The hotkey of add a code format is CTRL + SHIFT + ` which is frequently used and tedious.
So I decide to replace the hotkey by CTRL + `.
[!WARNING]
This hotkey is conflicted with Ditto’s hotkey, remember to modify the Ditto’s hotkey.
3.2.3 Quick Select
CTRL + D to select current word
then you can use: CTRL + SHIFT + ➡ /
CTRL + SHIFT + ⬅ to select more texts.
3.7 Windows
3.7.1 Quick Input Timestamp
Sometimes, we want to tape current timestamp but, how ?
Windows Setting:
Time & language ➡️
Language & region ➡️Language options ➡️
Microsoft Pinyin ➡️ Lexicon and self-learning
➡️Add or edit user-defined phrases
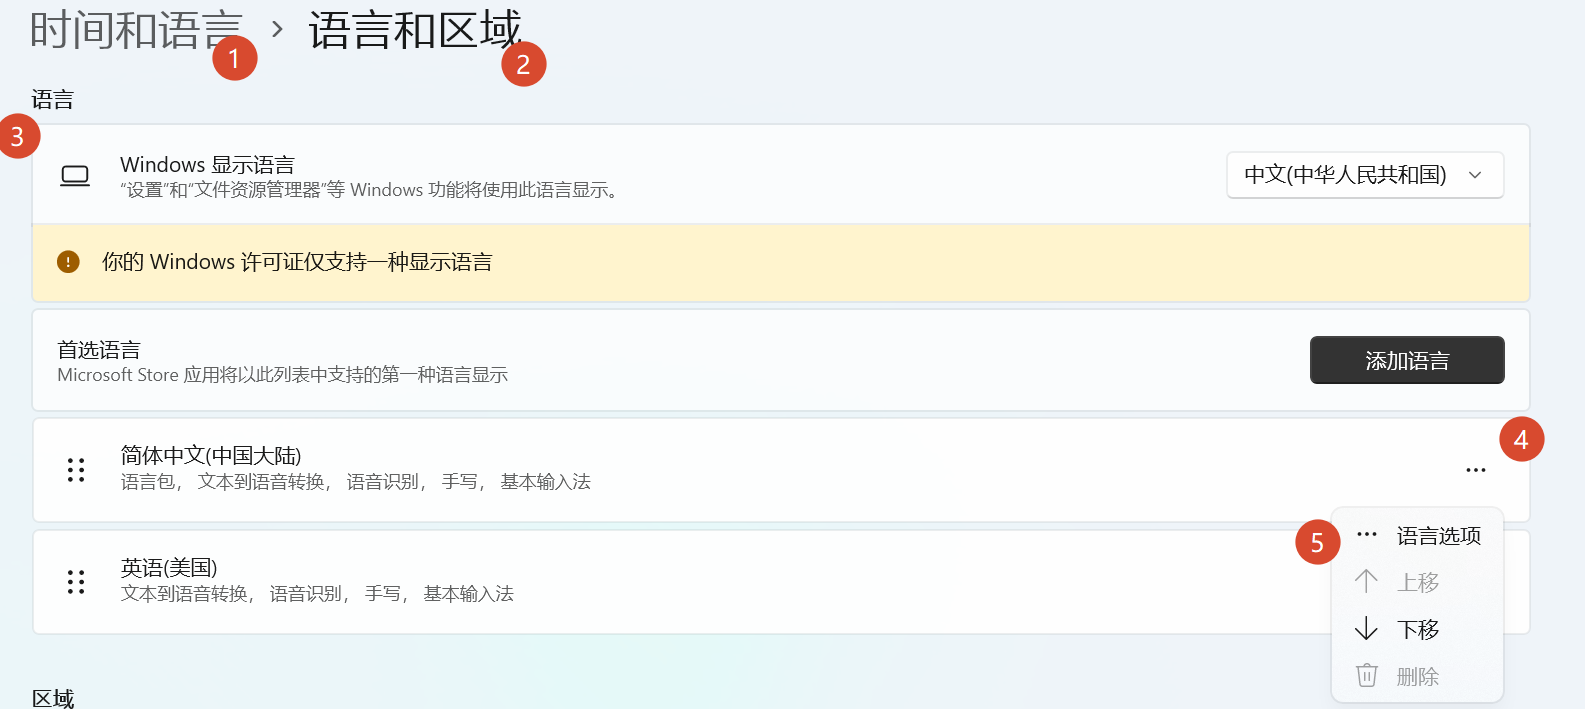
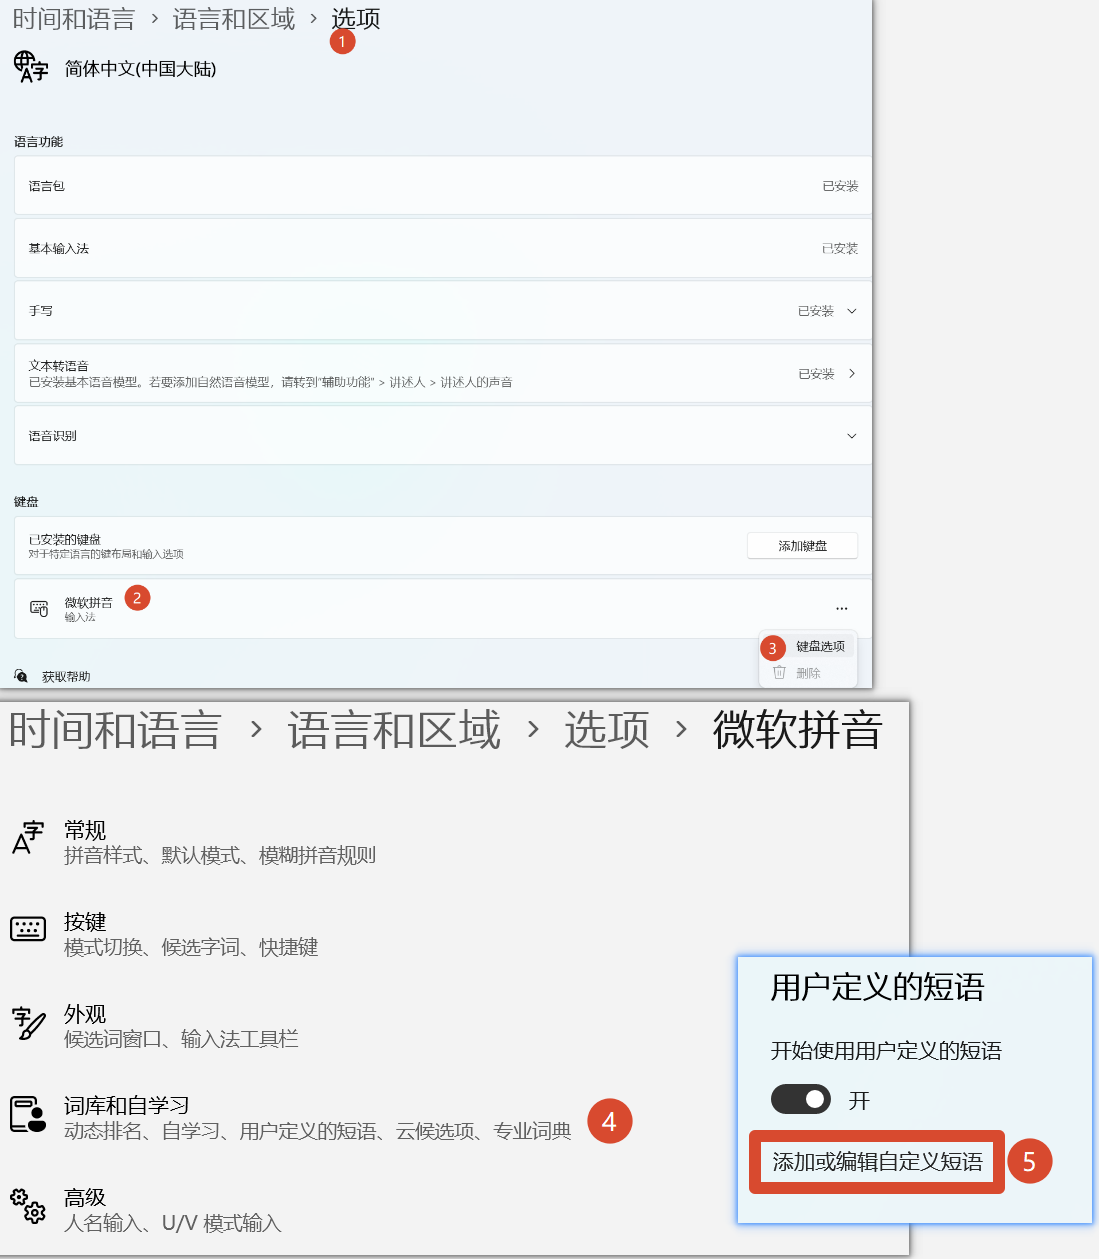
Then we add a new phrase:
1 | pinyin: time |
Then we can tape pinyin and get timestamp quickly.

[!NOTE]
The English Language doesn’t support this fucntion.
And it only support one timestamp item. If two items added, the timestamp will be static.